- Blog/
How to deploy Nuxt JS on Kubernetes Cluster (Part 2)
Table of Contents
Introduction #
In the previous tutorial, I explain how to dockerize Nuxt.js application. Now, we are good to deploy this docker image on a Kubernetes cluster.
Prerequisites #
Before you get started, you will need to have a number of things.
- Running Kubernetes cluster.
Pushing Docker Image #
We built our docker image on the previous tutorial, now let’s tag it and push it to Docker Hub. My Docker Hub username is omegion, so you should use your name instead.
DOCKER_USER=omegion
docker tag nuxt-k8s:latest $DOCKER_USER/nuxt-k8s:latest
docker push $DOCKER_USER/nuxt-k8s
Deployment #
Deployment is a declaration of Kubernetes Pod where we run our docker image on the cluster. We describe ReplicaSet, and container parameters here.
The first step for our Nuxt.js application on Kubernetes is creating a deployment. Again, I used omegion username to refer to my image that I pushed on the previous tutorial.
apiVersion: apps/v1
kind: Deployment
metadata:
  name: nuxt-k8s
spec:
  replicas: 1
  selector:
    matchLabels:
      app: nuxt-k8s
  template:
    metadata:
      labels:
        app: nuxt-k8s
    spec:
      containers:
        - name: nuxt-k8s
          image: omegion/nuxt-k8s:latest
          ports:
            - containerPort: 80
Applying Deployment #
Once we create deployment.yaml with Pod manifest, let’s apply this on the cluster.
kubectl apply -f deployment.yaml
If everything goes well, it will print:
deployment.apps/nuxt-k8s created
Now, let’s check the status of the deployment that we just created.
❯ kubectl get deployment nuxt-k8s
NAME       READY   UP-TO-DATE   AVAILABLE   AGE
nuxt-k8s   1/1     1            1           86s
Service #
A service is a network layer of Kubernetes Pod that allows us to communicate our pod running on the cluster. Without a Service we cannot connect to our Pod which runs a docker image of our application from the outside world.
As we exposed port 80 for our docker image, therefore, we assigned the port of the service to 80.
apiVersion: v1
kind: Service
metadata:
  name: nuxt-k8s-service
spec:
  ports:
    - name: app
      port: 80
      targetPort: 80
  selector:
    app: nuxt-k8s
Applying Service #
Now, we have a Pod running our application on the cluster. We need to create a service to expose this Pod.
❯ kubectl apply -f service.yaml
service/nuxt-k8s created
Let’s describe the status of the created service. If everything went well, you will see the description of the service we just created.
❯ kubectl describe service/nuxt-k8s
Name:              nuxt-k8s
Namespace:         default
Labels:            <none>
Annotations:       <none>
Selector:          app=nuxt-k8s
Type:              ClusterIP
IP:                10.43.158.98
Port:              app  80/TCP
TargetPort:        80/TCP
Endpoints:         10.42.1.33:80
Session Affinity:  None
Events:            <none>
Accessing to the Application #
We successfully created a deployment and service for our Nuxt.js application. Now, we’re good to connect to our application running on the cluster.
Get Pod Name #
In order to access the application, we need to know the Pod name that is created with Deployment. Kubernetes defines a unique name for each Pod. Let’s figure out what is the name of our Pod.
❯ kubectl get pods --selector=app=nuxt-k8s
NAME                        READY   STATUS    RESTARTS   AGE
nuxt-k8s-6f797f85d5-dmcb6   1/1     Running   0          7m52s
As we see above, the Pod’s name is nuxt-k8s-6f797f85d5-dmcb6. We will use this name to connect to the pod.
Port Forward to the Pod #
We will use Pod’s name to create port-forward through the service that we can access the application from local.
❯ kubectl port-forward nuxt-k8s-6f797f85d5-dmcb6 3002:80
Forwarding from 127.0.0.1:3002 -> 80
Forwarding from [::1]:3002 -> 80
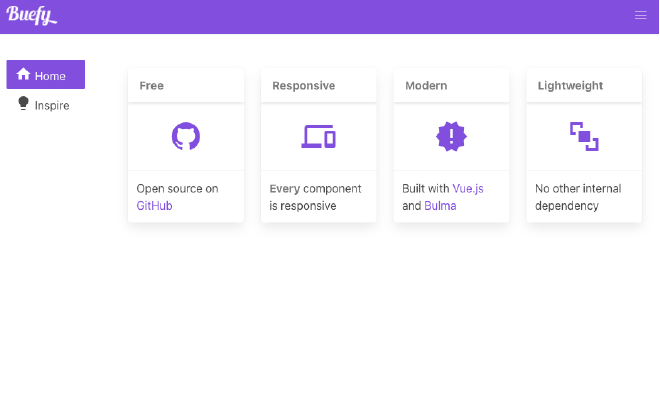
Now, you can access localhost:3002 on local. You will see the application running on the cluster.
Conclusion #
In this tutorial, we continued to the deployment of Nuxt.js application on a Kubernetes cluster. We created Deployment and Service manifests to be able to run our application on the cluster.
Finally, we could use the service to access Kubernetes Pod to reach our Nuxt.js application.